How to Add Upload Photo Option in Shopify Product Page Quickly?

-
Table of contents
Summarize this blog on
![]()

When searching for how to add upload photo option in Shopify product page, you will find two popular solutions. The first is editing your theme code (without an app), and the other is using a Shopify app. While adding additional code to your theme may be tricky, apps are easier to use and faster to implement.
This article will give you 4 quick steps to add an upload image button on the Shopify product page with Teeinblue Product Personalizer. Whatever your theme is, whether you’re an experienced developer or not, it can:
- Crop the uploaded image file in a fixed custom shape.
- Apply photo effects such as background removal, face cutout, cartoon, and black-and-white.
- Run smoothly with most Shopify themes.
- Remove the hassle of coding by giving an easy-to-use interface and features.
Especially, if you are going to enhance customer experience with personalized print-on-demand products, this app is one of the top-rated choices.
How to Add Upload Photo Option in Shopify Product Page in 4 Steps
Here are 4 steps on how to add upload photo option in Shopify using Teeinblue. Teeinblue is the top-rated product customizer to sell unlimited options with live preview across apparel, home decor, drinkware, and more. You can set up your first personalized product in 10 minutes through a 3-step workflow: add products, design & configure options, and publish. If you scale to large order volumes on Shopify, Etsy, WooCommerce, and other website builders, it can assist well.
- Install Teeinblue to your Shopify store
- Add the upload photo option to artwork (design)
- Prepare your product
- Connect products and artwork with photo upload integrated
Let's start practicing now to allow customers to upload photos on Shopify!

#1: Install Teeinblue to Your Shopify Store
At first, it is essential to install the app in your store. Direct to Teeinblue Product Personalizer on Shopify App Store > Log in with a Shopify store > Click Install app, Shopify will direct you to the store admin page > Click Install app again. When the installation completes, you can use all of Teeinblue’s features free for the first 14 days.

#2: Add the Upload Photo Option to Artwork
As a new user, you can quickly get familiar with creating personalized artwork with the upload photo feature. From the menu bar on the left, under the Product base page, click Artworks and continue to:
- Create a new artwork: Click New artwork or PSD group-to-template > Fill in all required information > Click Save to go to the Artwork Editor.
- Create an image layer: On the left, click Image > Upload a photo > Click Select to import the uploaded photo. Import completed, and you will have a new layer.
- Add the upload photo button: Hover on that layer, and you will see a pencil icon on its right side > Click it to open the Personalization Options table > Select Upload photo.


The process to enable the photo upload function
Then, the Photo upload setting shows up for you to:
- Add an option title on the product page, for example, “Upload your image.”
- Enable customers to crop photos and see a live preview of final products.
- Apply photo effects like background removal, cartoon, face cutout, and black-and-white.
- Give customer instructions, for example, “Please upload a transparent photo.”
- Other settings: Mark this option as required and Show customization information on your cart and checkout.
💡 You may also like: How do You Add More Advanced Custom Options for Shopify Products?
#3: Prepare Your Product
With Teeinblue, you can integrate multiple image uploader buttons for existing Shopify products or items from any print-on-demand provider. If you already have Shopify products, you can skip this step. To add a new print-on-demand product, practice the following steps:
- Direct to the menu bar on the left side of the portal. Click Product Base.
- Direct to the top right corner, Select Import Product or Add Manual to add your product.
- Complete the product with essential information: name, SKU, mockup images, print areas, and variants.

#4: Connect Products and Artwork with Photo Upload Integrated
This step helps you to publish a product with photo upload buttons to sell. You can combine multiple artworks and products to publish as one Shopify product.
Here you go:
- Select Campaigns on the left menu bar > Select by Shopify products to connect your existing products, or select by Product Base to personalize the created one in the #3 step > Choose products.
- Click Select artwork created in the #2 step to choose your designs.
- Preview the campaign name, add mockups, and test the upload photo button.
- When the message at the bottom is green, click Launch in the top right corner to publish the photo upload button on the Shopify product page.

A campaign by product base for personalized print-on-demand products
Once your customers add products with photo customization to the cart, or go to the checkout page, the order will include the product name and customization information (if you enable it in the setting). You can place a test order to check if it works properly.
Bonus: You can create one-by-one or use Bulk creator to combine many products with an artwork having an upload photo option.
Check the example to insert the upload photo button for canvas printing on Shopify!
Can You Add Upload Image File Button in Shopify Without App?
Yes. You can add templates, sections, and blocks to your theme code to create an image file upload button. The process often includes 5 main steps:
- Go to the store admin page > Online Store > Themes > Edit code.
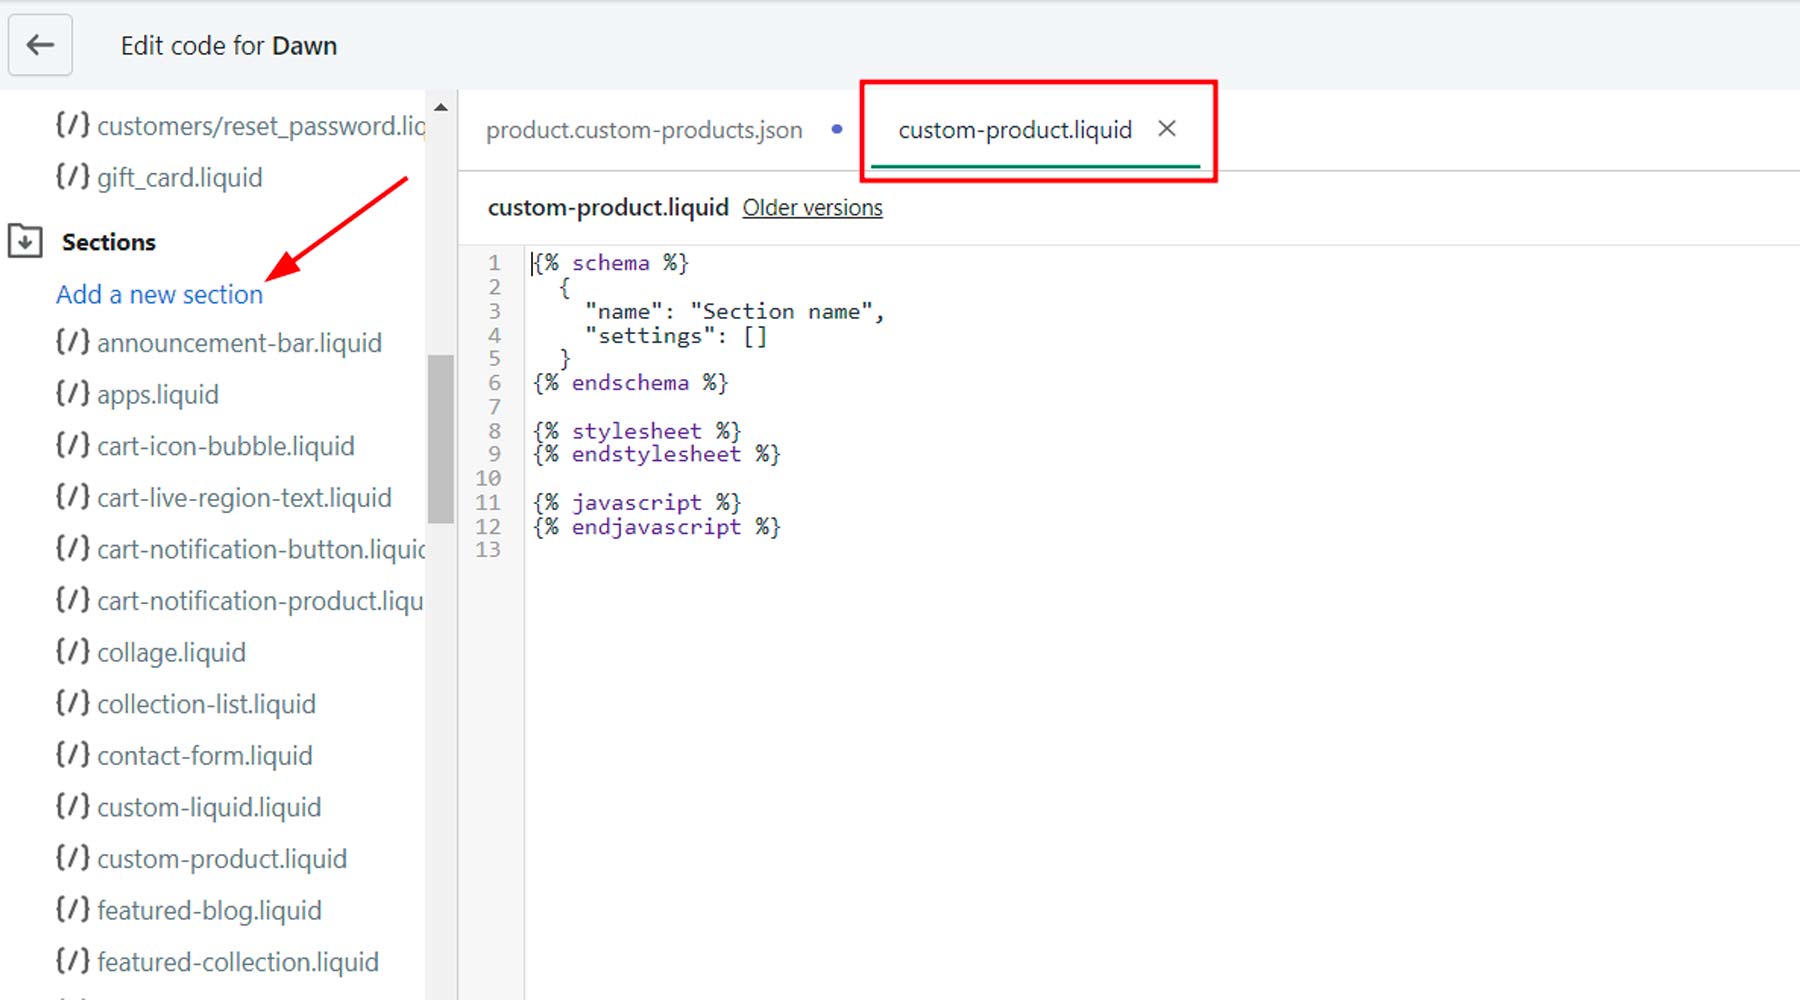
- Create a new custom product template in the Shopify theme
- Code a custom section to add an upload photo button
- Apply the new template to a product
- Manage (show/hide/…) customization information in the checkout, cart, and emails.
If you are an experienced developer, it is easy to control the site performance, such as site loading speed, response time, render time, etc. Besides, it is fast and free.
However, if you are not a skillful developer, it may be:
- Complex and time-consuming. You may find instructions somewhere on the Internet, but each one is only for specific, not most, themes. So, it’s tough to find what is suitable for you.
- High risks of errors or bugs that can interrupt the buying journey. Hire a skillful developer from the beginning or add an app to utilize their support to avoid irrefutableness.
- Not for products with multiple personalization options. The higher the level of product customization, the more complex the code. Spending time and money on an app is much more cost-saving.
Editing a Shopify theme requires programming knowledge
Hope you find this article helpful about how to add upload photo option in Shopify. As an online merchant, which method do you prefer? Don’t hesitate to share your opinion or place a question in the Teeinblue group for personalized POD products!
RELEVANT ARTICLES
2 Ways to Create Customizable Products in Shopify That Convert
Step-by-step Guide to Add Custom Text Field on Shopify Product Page
Newsletters
Subscribe to get exclusive POD tips, trends, and insights!
